Custom Baby Swing {DIY}
June 10, 2011 at 1:25 am 2 comments
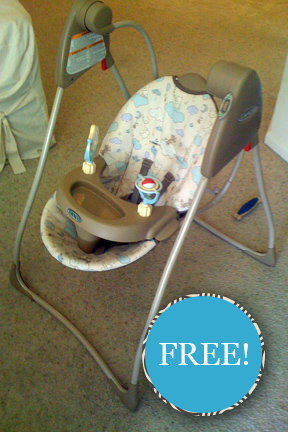
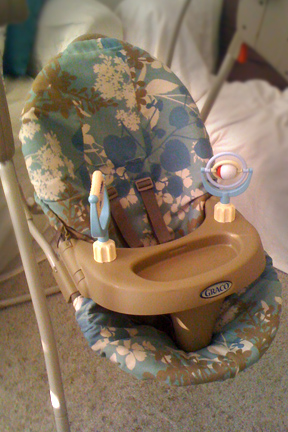
Here’s a brief summary of the custom baby swing cover I made today! The total cost for this project was $9.I received this baby swing several months ago through freecycle.com and loved that it’s in great shape and even works (sometimes a rarity with freecycle). I just wasn’t thrilled with the Disney fabric on it and knew instantly that I wanted to change it.
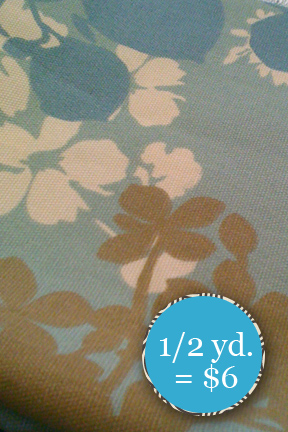
Since this baby item will be more like a piece of furniture in our main living area, I wanted to pick a fabric for it that was less “nursery” and more in tune with the colors and textures of our family room. I found this blue floral fabric in the sale section of a local store and snatched it up for only $6 (1/2 yard*).
The basic project was fairly simple. I completed it in just several hours. First, I layed the fabric out on the seat and cut around it (leaving ample room for hemming). This gave me the basic shape for the seat cover. Just make sure that when you lay it out that you push into the seat as if a child is sitting there. This will ensure that you’re making it large enough.
Next, I ironed and hemmed all the way around the fabric leaving a 1″ hem that I could slip elastic through. The elastic, by the way, cost about $3 (and I have lots left over). Once the cover was hemmed, I pulled the elastic through and sewed it up. Now it looked like a small fitted sheet.
The next step was possibly the most complicated: sewing button holes. This had to be done to pull the buckles and straps through the cover (so my little one can be safe). So, with the cover actually ON the seat, I used my fingers to feel where the straps were underneath and marked the spots for the button holes with chalk. Now, the only thing left to do was use my sewing machine to create those button holes. This isn’t a terribly complicated step, except that with the elastic already in place, it was a kind of nuisance dealing with bunched up fabric around my button foot.
And that’s it! Pretty simple!
*I did find that 1/2 yard of fabric was a bit too narrow to actually fit the seat, so I split the piece down the middle and added the remnants of the fabric to create a center column on the cover, thus extending the width. You could always buy 3/4 yard and save yourself the trouble.
Entry filed under: Uncategorized.
2 Comments Add your own
Leave a comment
Trackback this post | Subscribe to the comments via RSS Feed


1. Laurie Cuchens | June 10, 2011 at 2:04 am
fantastic!! And it matches those toys on the tray perfectly!! You are so handy! Can’t wait to see what else you do for baby!!!!
2. Carol Seefeldt Moore | June 10, 2011 at 5:00 am
Love it! Great job!